 alink
WH64 Headset on 3CX via your computer and connecting your mobile phone via Bluetooth.
alink
WH64 Headset on 3CX via your computer and connecting your mobile phone via Bluetooth.We recommend that you install the latest version of Yealink USB Connect before commencing any further setup, it can be downloaded from here: https://www.yealink.com/en/product-detail/usb-connect-management
this will allow you to update the headsets firmware and make any advanced changes to it if you need to such as auto answering a call when you lift the headset off its cradle and other features.
The video below offers a great overview of the basics for setting up and using the headset, please ensure to still install the Yealink USB Connect app first and follow our further instructions below for how to integrate with 3CX:
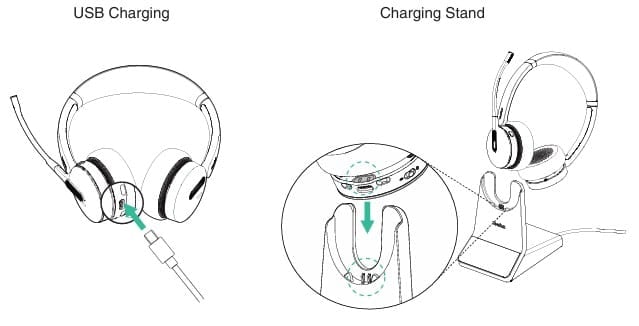
Once you have unboxed the headset and accessories plug your headset into power and into your computer using the supplied USB-C cable, as per the diagram below:
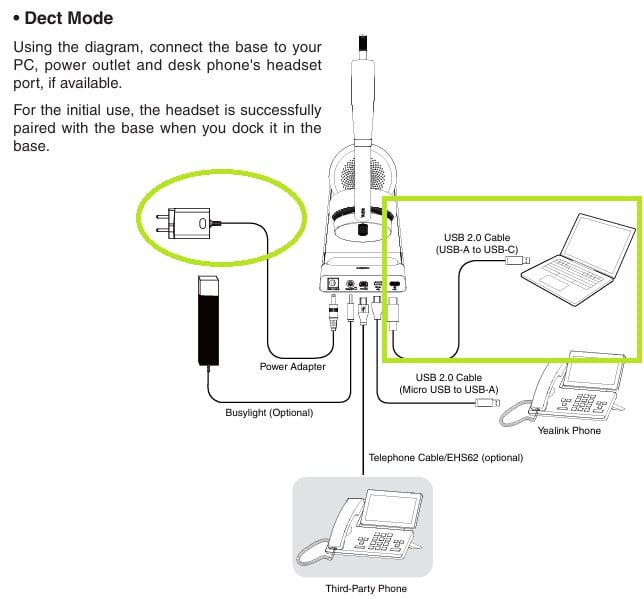
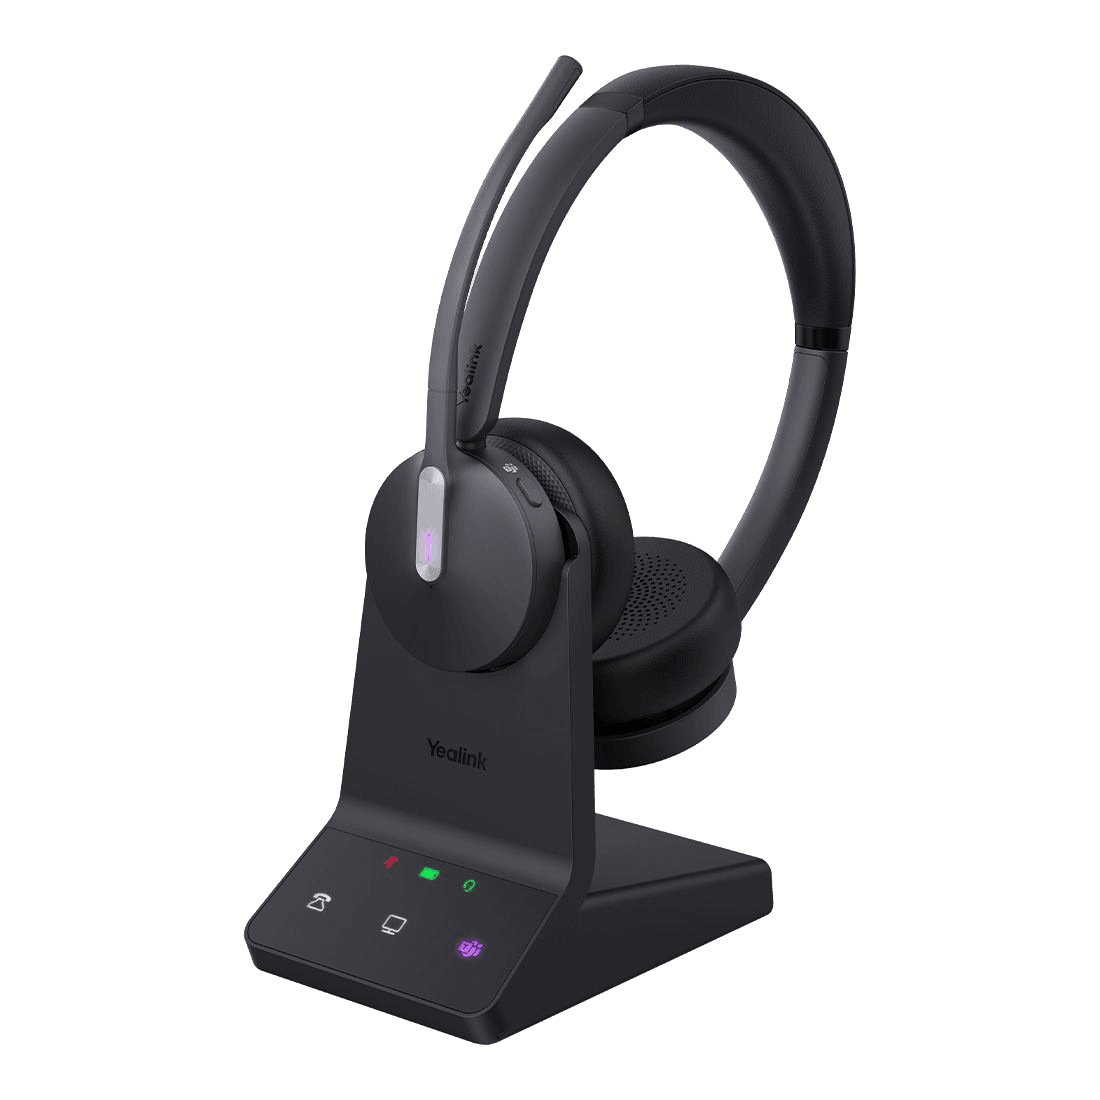
Once the headset is plugged into power and into the computer you can then place the headset on the Charging Stand, it will blink blue for about 3 seconds whilst it pairs to the computer.
When using the headset for the first time, it is highly recommended that you fully charge the headset first either via USB or the included charging stand.
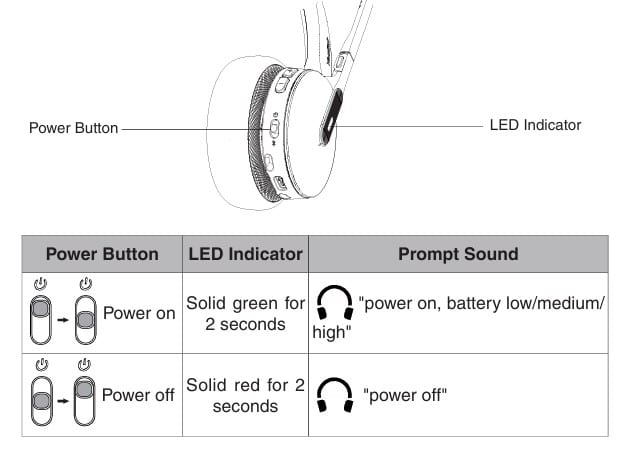
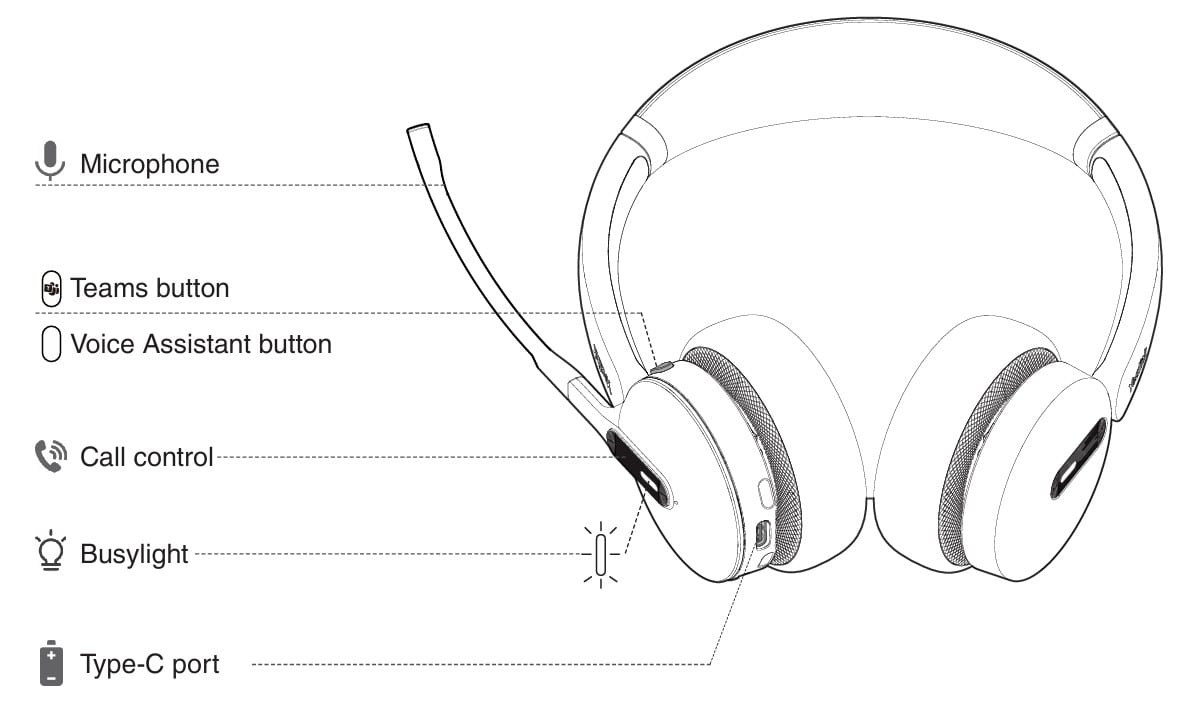
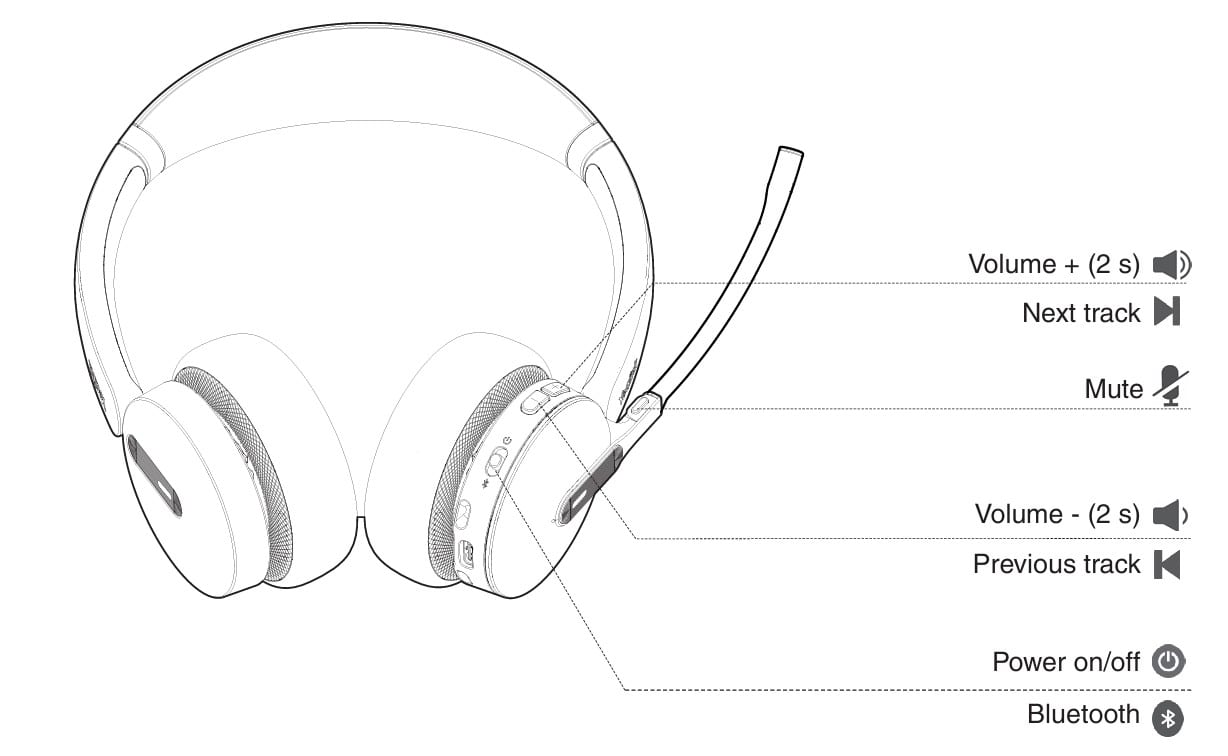
Basic headset functions overview
Integrating your headset with 3CX
Ensure to install the 3CX app using these instructions, if you do not have it installed already.
Once the headset's firmware has been updated via the Yealink USB connect app and 3CX is installed and you can now integrate the headset with your 3CX desktop app.
To do this:
- open your 3CX Desktop App
- select Settings
- then Audio Options
- then click on the checkbox for Headset and choose your headset from the dropdown.
you may have to select and de-select this checkbox a few times before your Headset model appears on the drop down, but once it does select it and also check that the Ringer, Speaker and Microphone are all set to be the Headset as well.
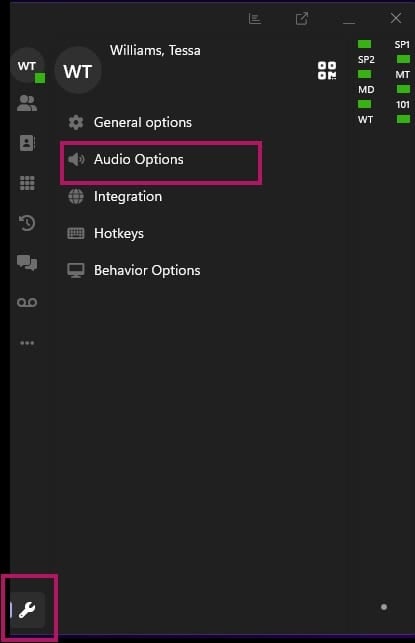
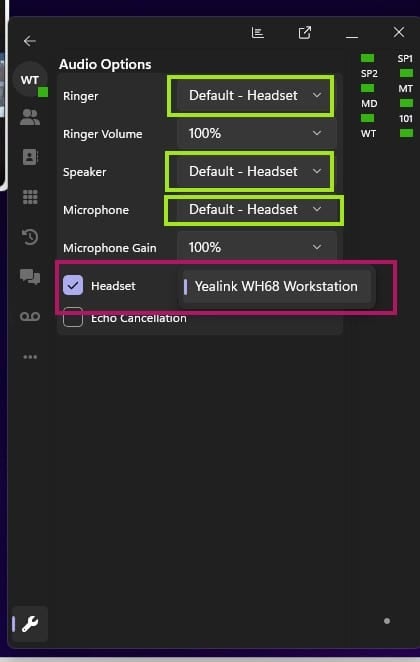
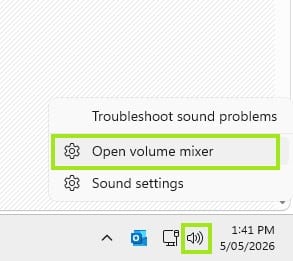
As the headset can also be used for general use on your PC such as for Teams meetings, YouTube and other applications that require sound you can then head to your system sound settings to confirm that the headset is setup as the default device, to do this:
- right click on the sound icon on the system tray in the bottom right
- then select Open Volume Mixer
Once the Volume Mixer is open you can check that the Headset is set as your default device and is also recognised as the default device for 3CX
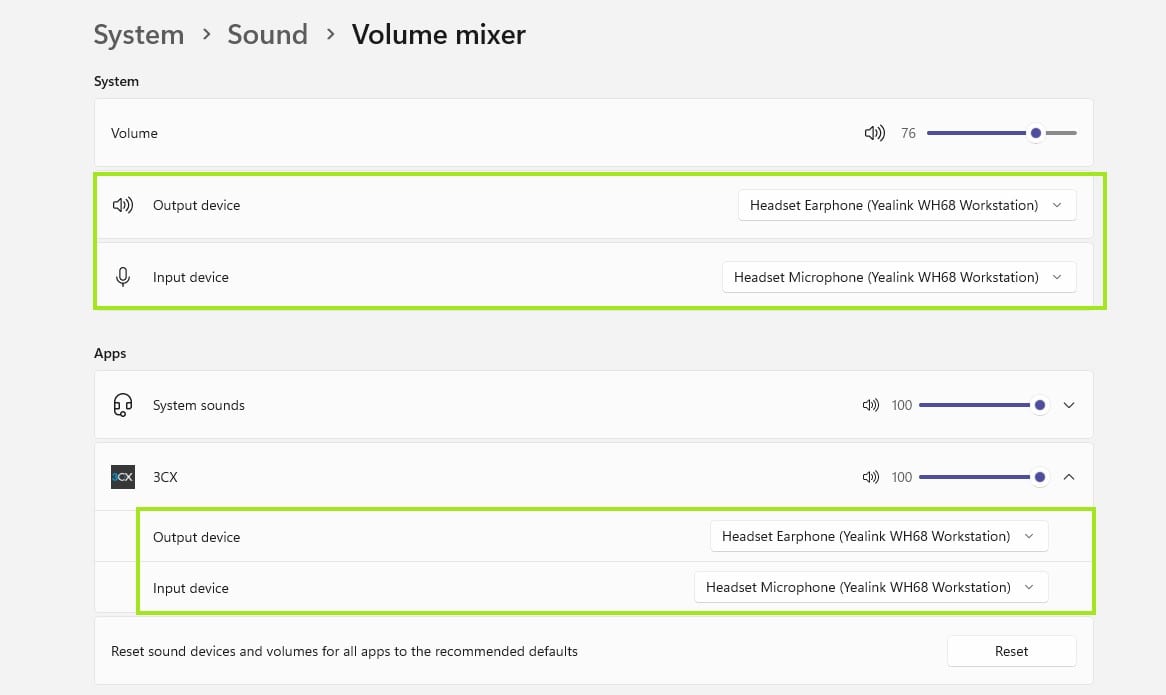
Now that the initial setup is complete you can start using your headset for calls and other tasks.
Basic functions
If you have integrated your headset with your 3CX app you can now answer and hang up from calls using the 3CX app.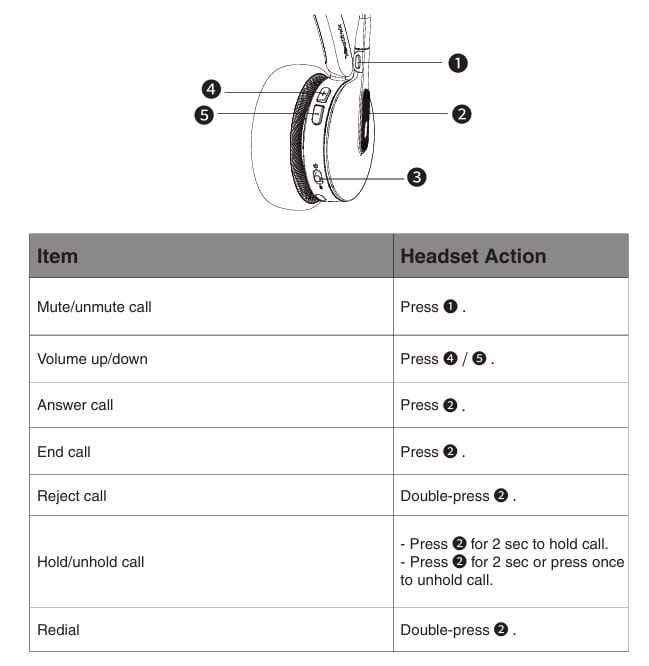
Muting made easy
One of the most important and most used functions is Mute, you can mute your headset so that your caller cannot hear you by either lifting the microphone up so that it faces upwards or press the Red button ont he microphone itself.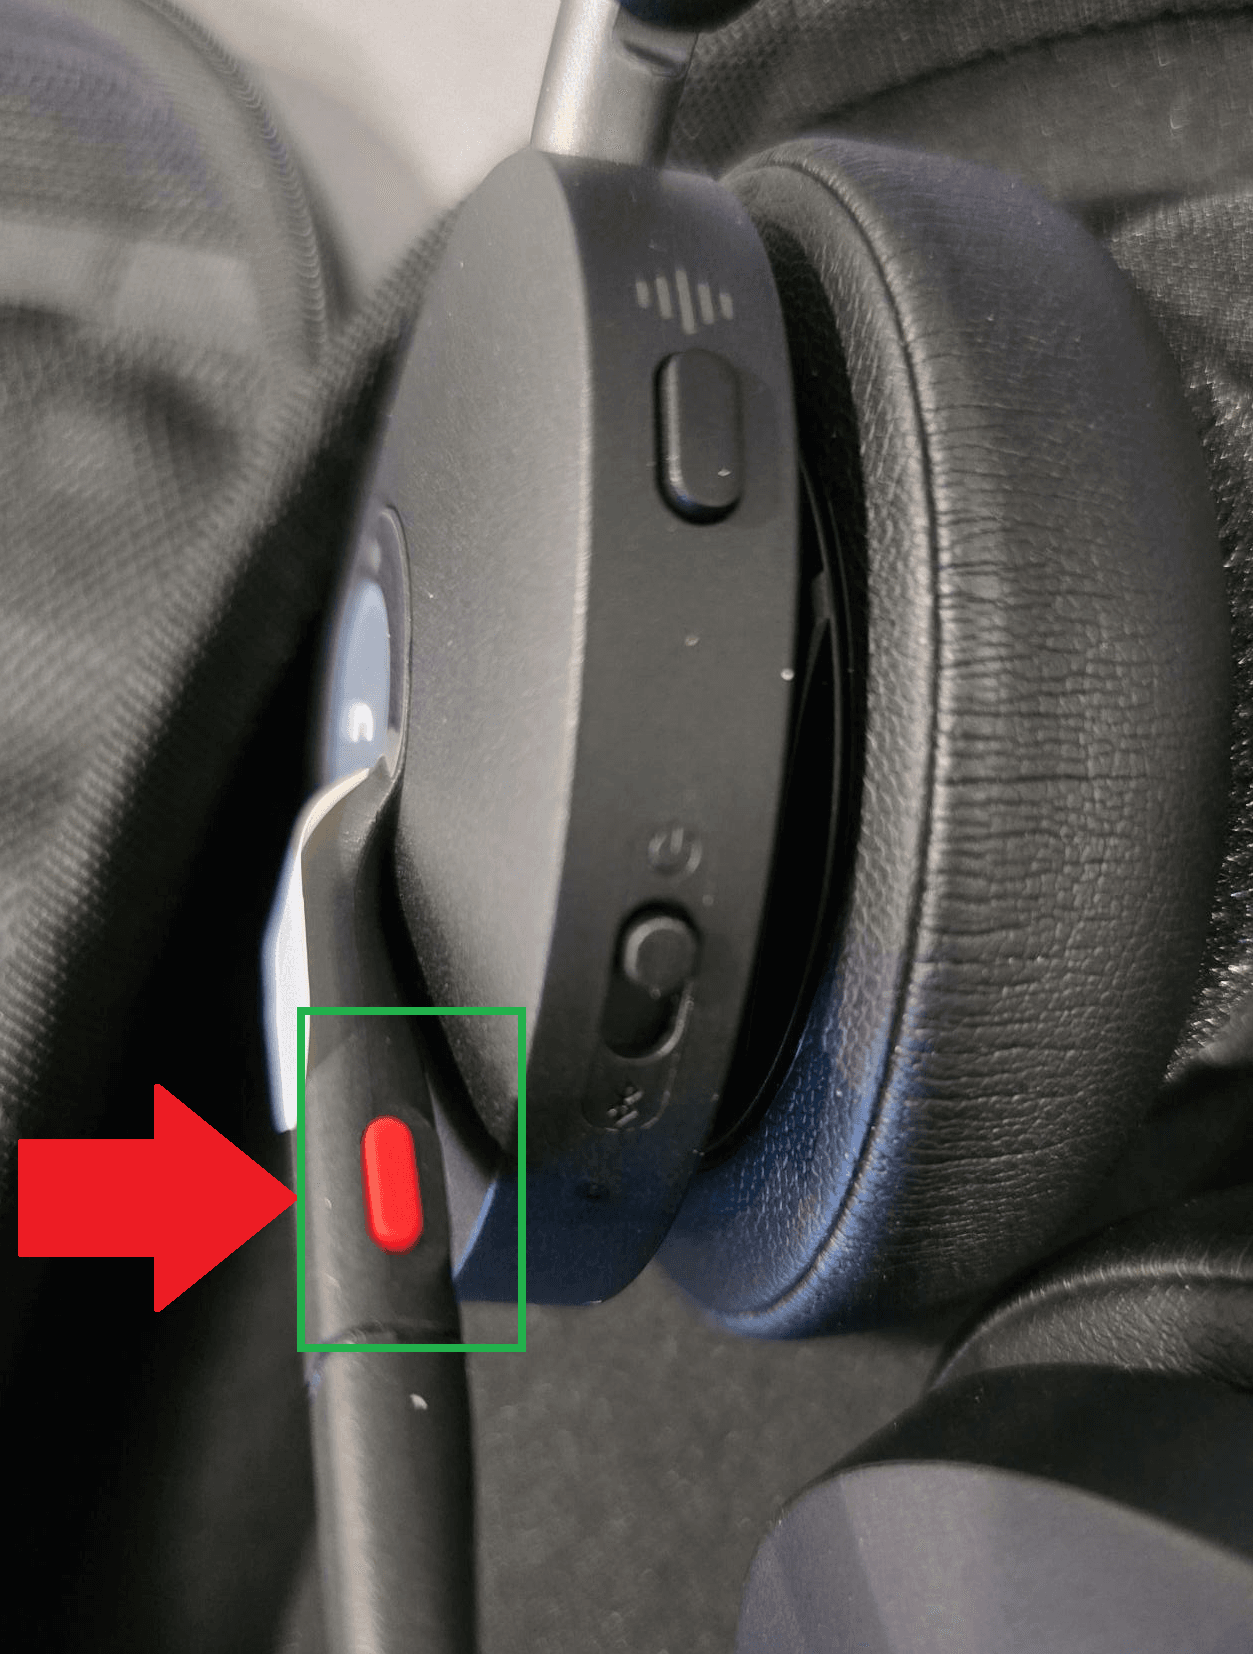
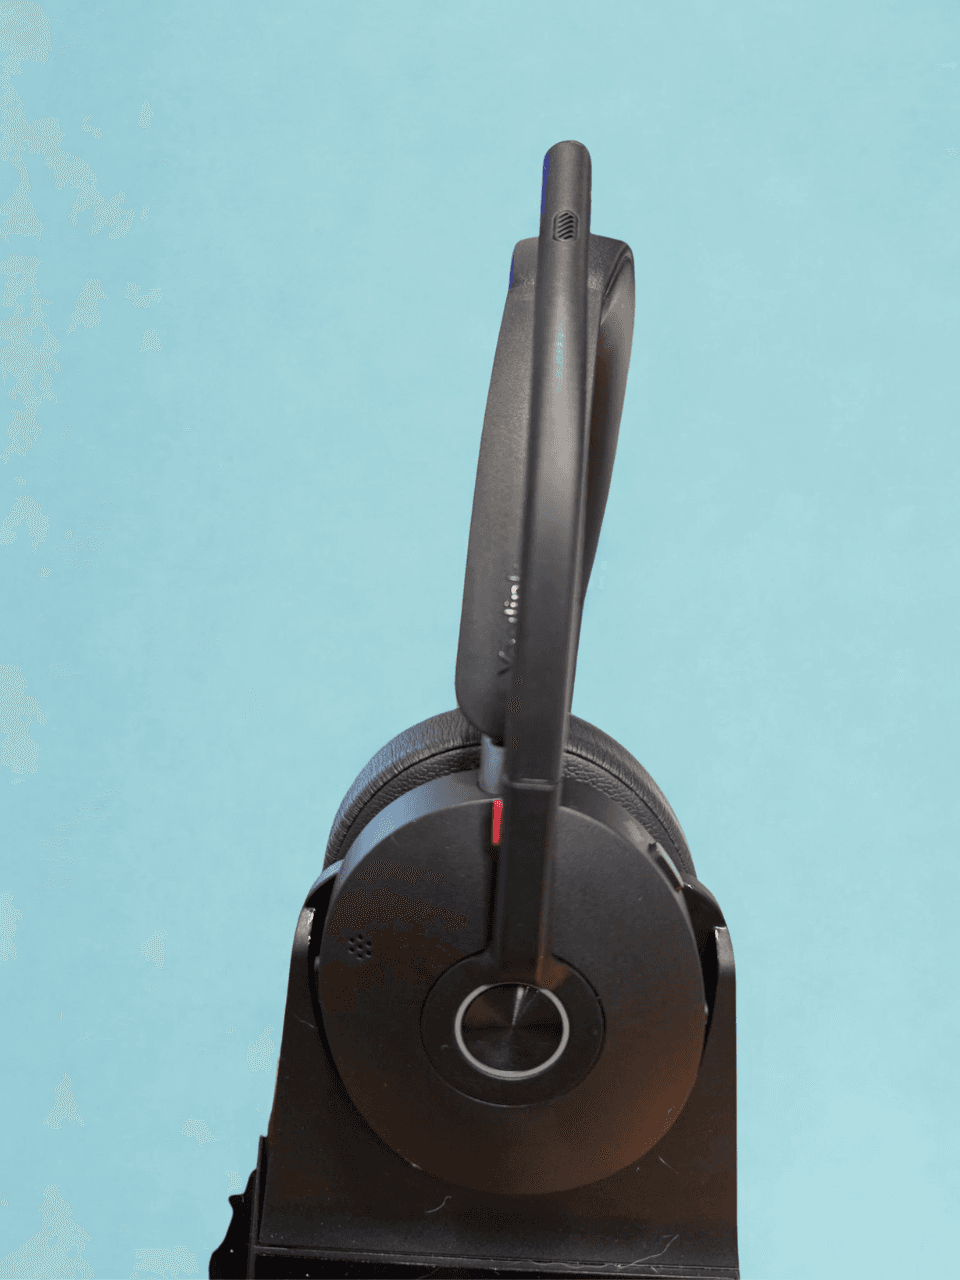
Connecting to a mobile phone
If you have a mobile phone that you would like to connect to the headset via Bluetooth:- Ensure Bluetooth is switched on in your mobile phone setttings
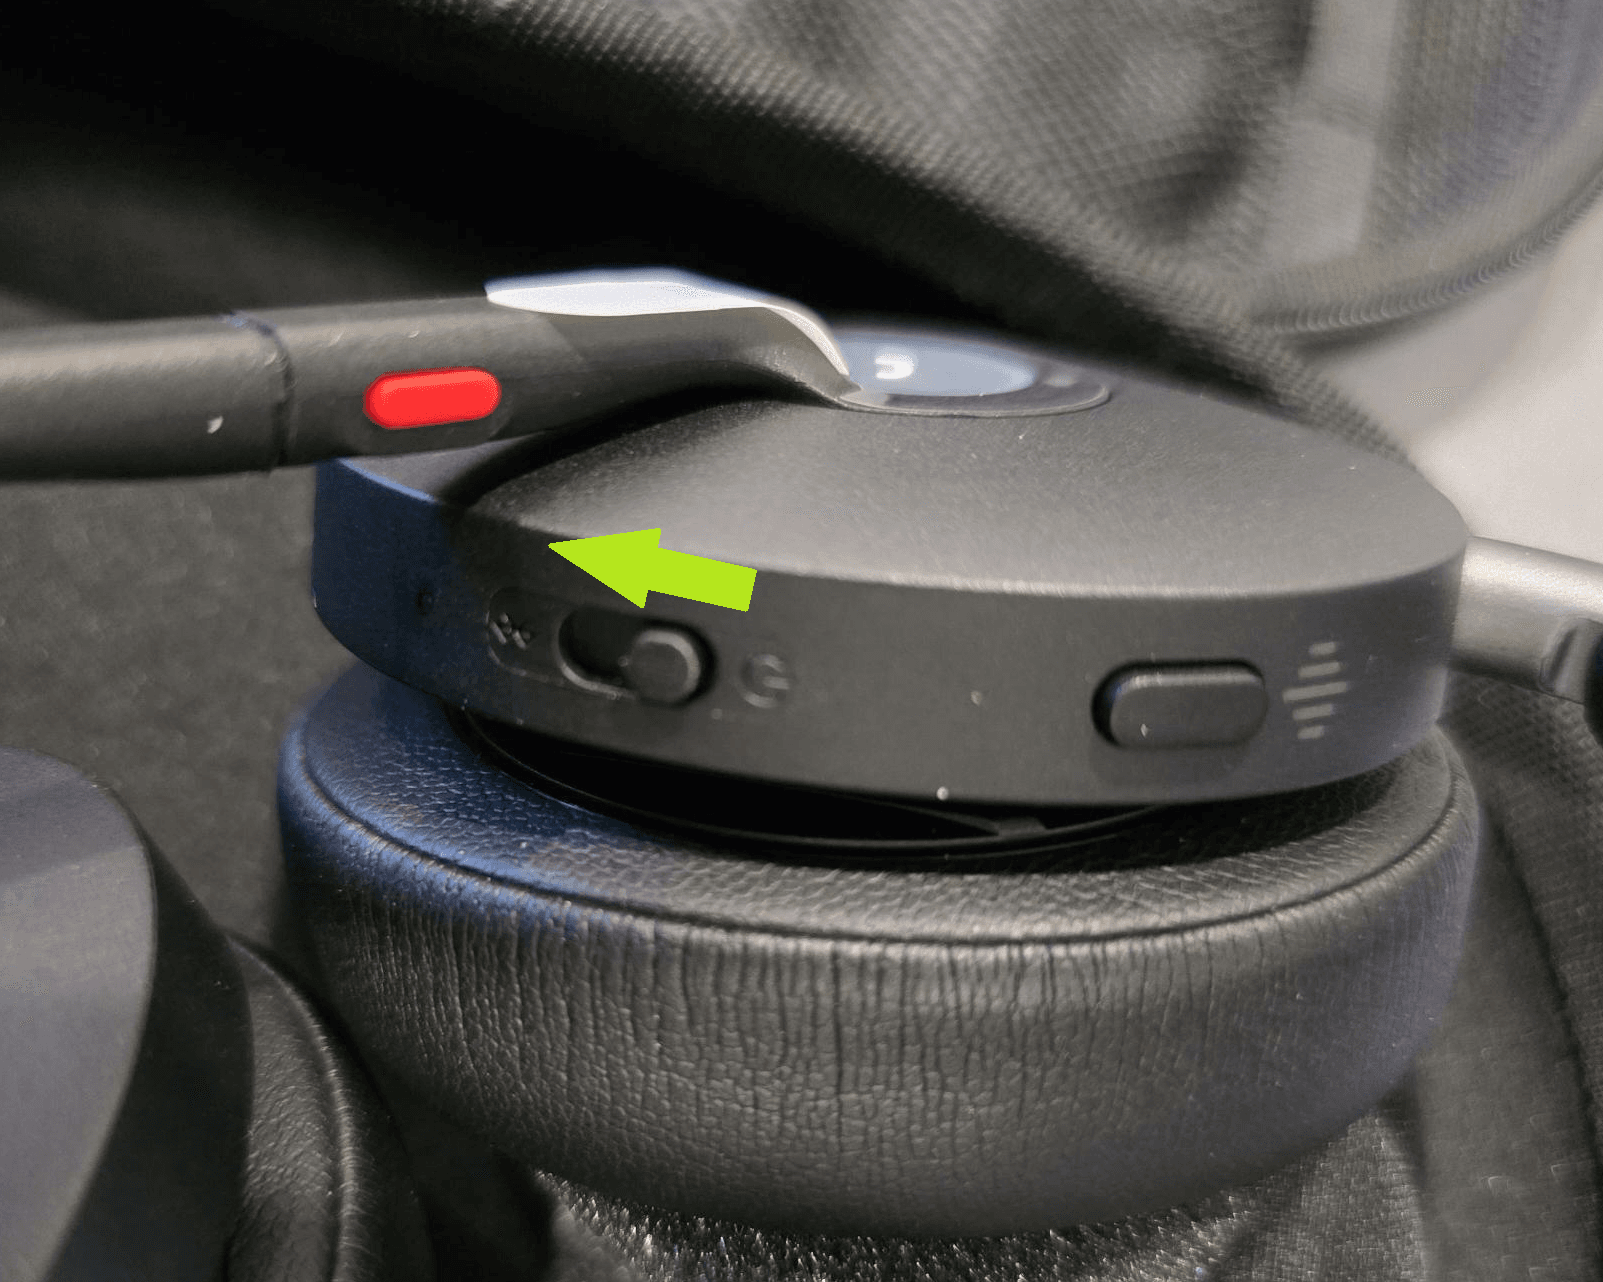
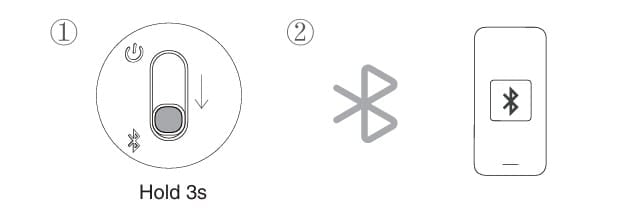
- On the headset pull own the toggle on the microphone side of the headset towards the Bluetooth symbol for 3 seconds
- You will then be able to select the headset as an available bluetooth device on your mobile phone