We aren't just all about Cyber Security here at FortiTech, we have quite a few Managed Services clients too, meaning that we look after all their technology support needs.
Lately, we have been receiving a few queries about Microsoft Outlook and the best ways to make use of its inbuilt features and increase productivity. We have compiled just a small selection below of the queries we have been receiving and our tips for each, so without further ado, lets cover the following:
- Adding folders to Favourites for easier monitoring aka "How on earth do I manage all these mailboxes?"
- Creating Quick Parts
- Adding multiple time zones to your calendar
- Using Quick Steps
- Creating a Teams meeting in your calendar
Adding folders to Favourites for easier monitoring
Finding yourself juggling multiple inboxes within Outlook? you might just find a new best friend in the Favourites function, here's
how:
1. Find the folder within a mailbox you would like to monitor quickly, usually this is the Inbox but can also be sent items or any other folder for that mailbox.
2. Right click the folder and navigate down to Add to Favourites
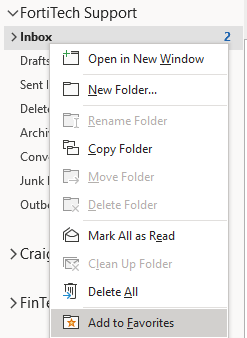
3. Once done, the folder will be added to your Favourites which is found at the very top of Outlook above all your other mailboxes, so it
saves you time scrolling through 6 different mailboxes to check if a new email has come through, using this feature you can quickly
see that there are new unread messages in our Support inbox, we better get onto responding to them.....

4. You can easily remove a particular folder by following the same steps then choosing Remove from Favourites.
Create a Quick Part and save yourself time with common responses
If you spend a lot of time typing the same answers to questions you get repeatedly, create Quick Parts to insert that text into email
replies in just a few clicks. No need to keep typing the same thing over and over again or having to find an old response to copy and paste.
When you’ve finished typing a response that you expect to need to send again, follow the steps below to save the text as a Quick Part:
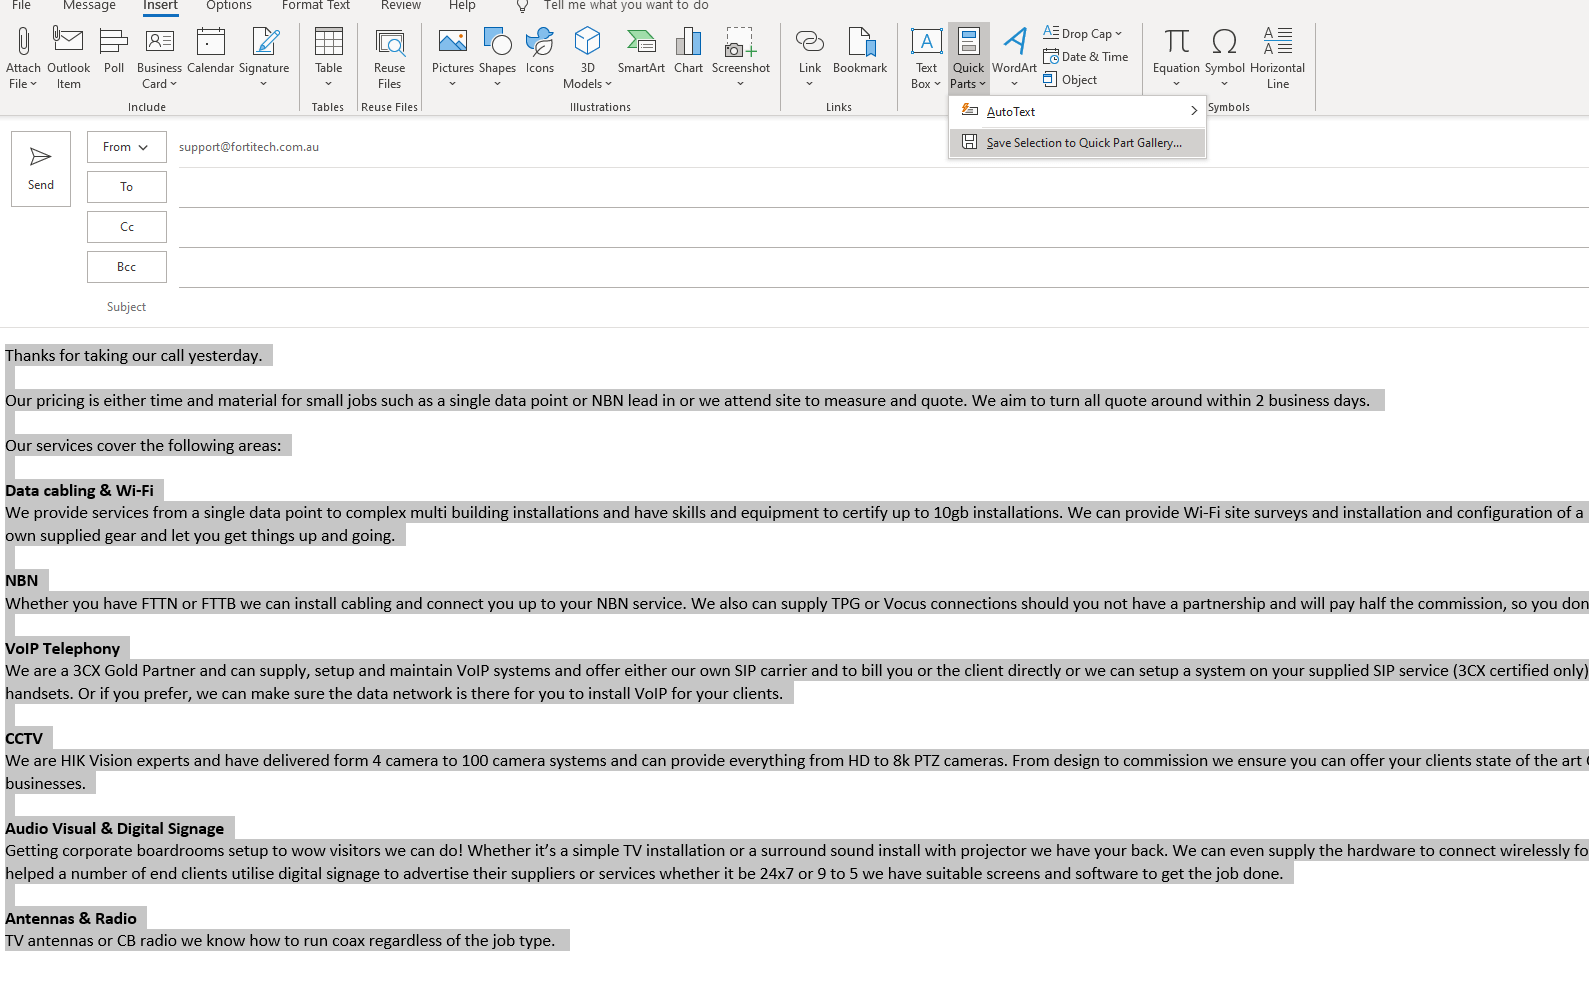
- Highlight the text you want to save in the email, and click the Insert tab.
- Within the Insert menu, click Quick Parts and select Save Selection to Quick Part Gallery.
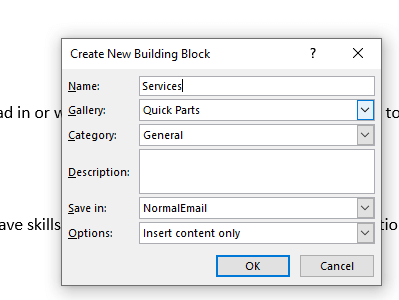
 Give
your new Quick Part a name, and click OK.
Give
your new Quick Part a name, and click OK.
With this Quick Part saved, you can now add that text to any email with just a couple clicks.
With your cursor in the body section of the email, click the Insert tab.
Click Quick Parts and then select the Quick Part you want to insert.

The prewritten text will automatically appear in the body of your email, and you can edit and customise it as needed for your new response.
Set Up Multiple Time Zones for Calendar
Daylight Savings time has rolled around again and us poor Queenslanders can end up a tad confused as to what on earth the time is south of
the border, let alone anywhere else in the world.
Keeping track of all those time zone differences can be challenging, this next tip for Outlook can help you avoid contacting a colleague or
prospective client in the middle of the night.
You can display up to three time zones on your Outlook Calendar.
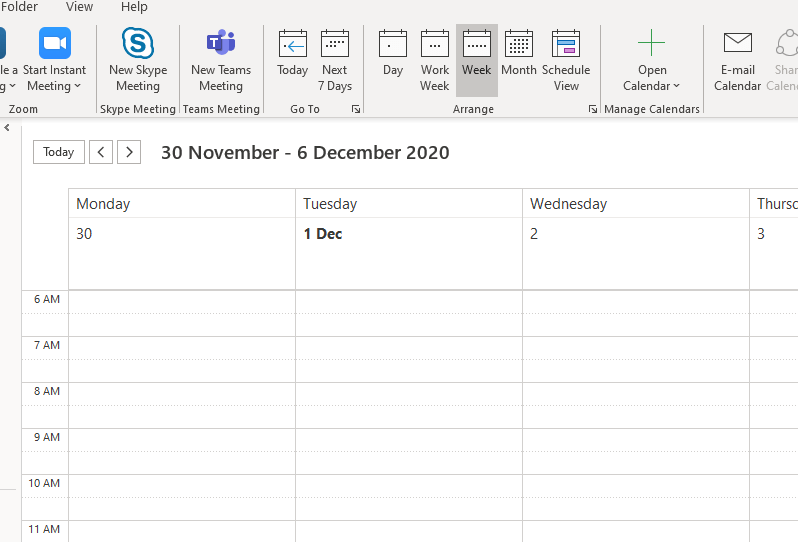
1. Open your Outlook Calendar
2. Right click on the times listed on the left hand side and navigate to Change
Time Zone
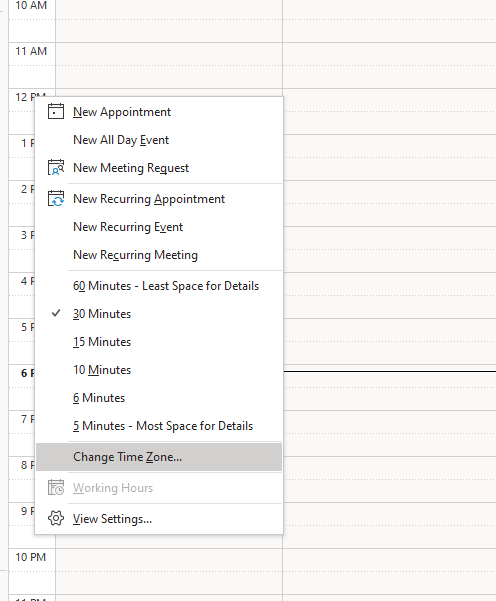
3. Under the Time Zones, you'll see that you've got up to three options:
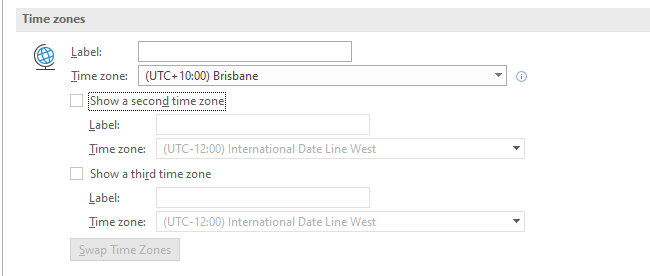
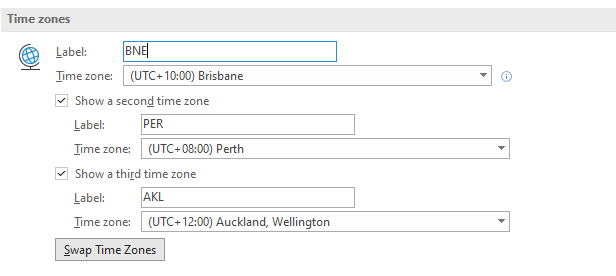
4. Type the name for each time zone you want to add in the Label field.
5. Use the drop-down list to the right of each Time Zone field to select a time zone you want to display on your Outlook calendar. Then
click OK.
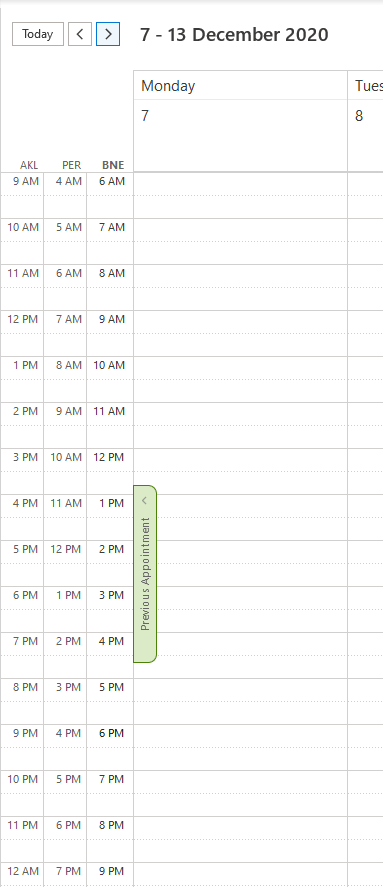
You'll notice the calendar now has three time zones displaying, side-by-side. No more waking up Perth colleagues!
Use Quick Steps to Take Instant Action on New Email
Quick Steps allow you to automatically perform long strings of actions based on a trigger.
Say at the end of the month you receive a series of invoices from vendors or contractors. Your normal process is to review the invoices, forward the invoices to your accounts person, and create a reminder to follow up with accounts a week later to make sure the invoices were paid.
Quick Steps can take care of the last two steps for you with fewer clicks than if you performed the tasks manually:
1. Click the Create New button in the Quick Steps section of the Home ribbon.

2. Give the new Quick Step a descriptive name, and select the first action: Forward.
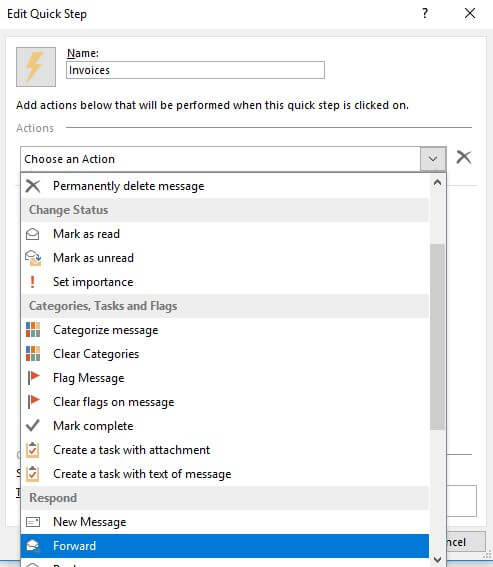
3. Type your accounts person's email address into the To field.

4. Click the Add Action button to select the second action: Create
a task with attachment
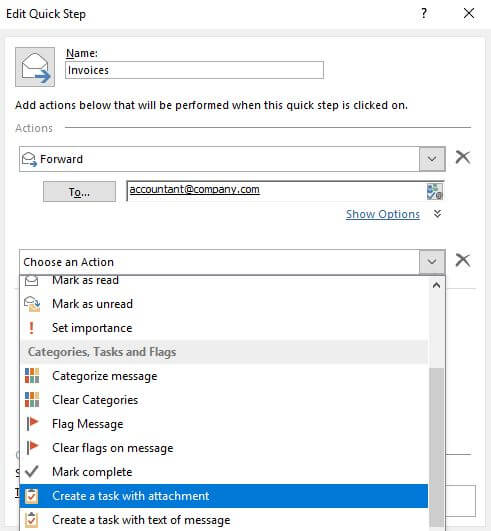
5. Click Finish to create the Quick Step.
After you review an invoice, you can now execute the Invoices Quick Step to forward the email and create a reminder task.
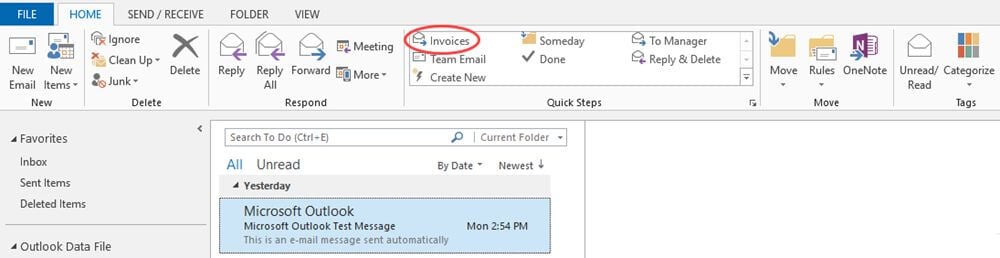
The email forward and task windows will open automatically.
Set an out of office message on Outlook
With the silly season coming up many offices will be closing for a period of time, using the Out of Office function is a great way to let
clients and suppliers know that you are away from the office and when you'll be back, it also gives you the opportunity to include emergency
contacts and other information in your message as well.
To set up your automatic replies just follow these steps....
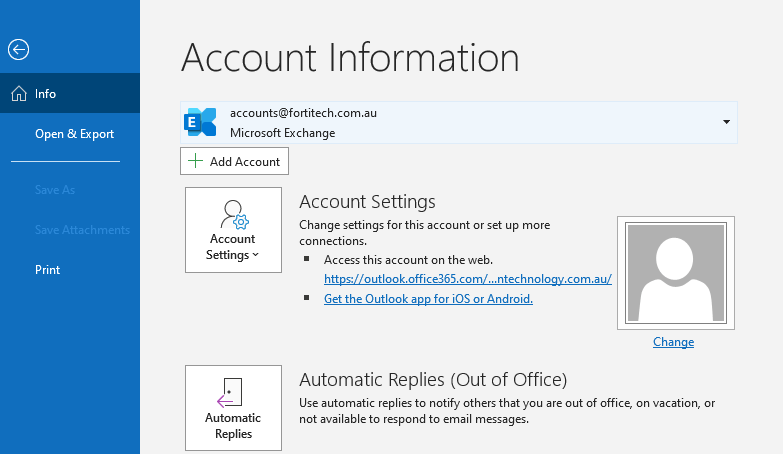
1. In Outlook select File in the top left
2. Choose the Automatic Replies (Out Of Office) option
4. Choose the start and finish dates and times for your absence
5. You can choose to include different wording for contacts within your company and those outside, just change to the Outside my Organization tab to customise the wording for your external contacts.
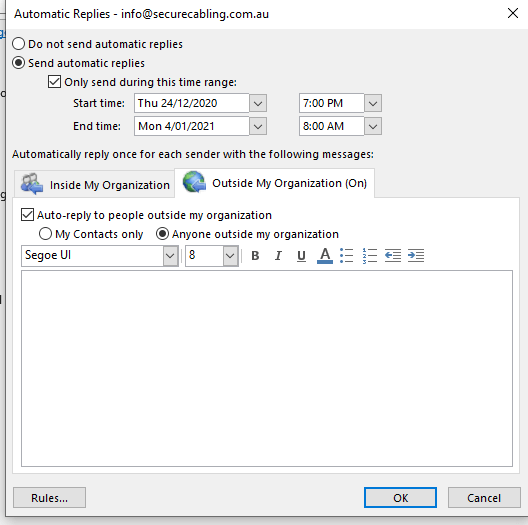
6. Press OK and your replies are now set up and you can enjoy a well earned break.
How to create a Teams Meeting
Here is a quick and simple way to create a new Teams meeting in Outlook and quickly join it at the scheduled time.
1. From your Outlook Calendar click New Teams Meeting located on the Home Ribbon.
2. Choose the date and time for your meeting and include all the attendees that you would like to send the invitation to.
As you can see from the example below, the quick join options are automatically included in the body of the email, allowing attendees to
click to join via computer or app.
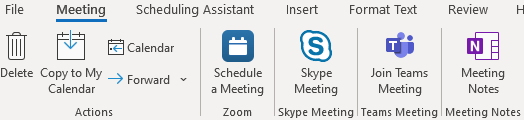
3. You can also jump back into the meeting within your Outlook calendar and select Join Teams Meeting when it is due to start and the Teams app will automatically open ready for you to join.
There you have it, some of the most common Outlook tip requests we have received recently. Keep an eye out on future blogs for more tips for Microsoft Office Suite products.