Making changes to your computer such as installing software, applying updates, or adjusting settings doesn’t usually cause problems. But when it does, having a restore point can save you a lot of time and frustration.
A System Restore Point is like a safety snapshot of your Windows system. If something goes wrong, you can roll your computer back to a
previous working state without affecting your personal files.
Why Restore Points Are Important
Restore points give you a simple way to recover from issues such as:
- A Windows update causing problems
- A new app or driver not working properly
- Unexpected system errors or instability
They don’t replace backups, but they are a quick and effective first line of defence when something stops working as expected.
The Benefits of Using Restore Points
- Quick to create
- Easy to restore from
- No impact on your documents, photos, or emails
- Built into Windows - no extra software required
It’s a small step that can prevent a big headache later.
Before You Start
System Restore is usually turned on by default, but it’s worth checking - especially on new or freshly set‑up computers.
Creating a restore point only takes a minute or two.
Creating a Restore Point in Windows 11
Step 1: Open the Start Menu
Click the Start button or press the Windows key on your keyboard.
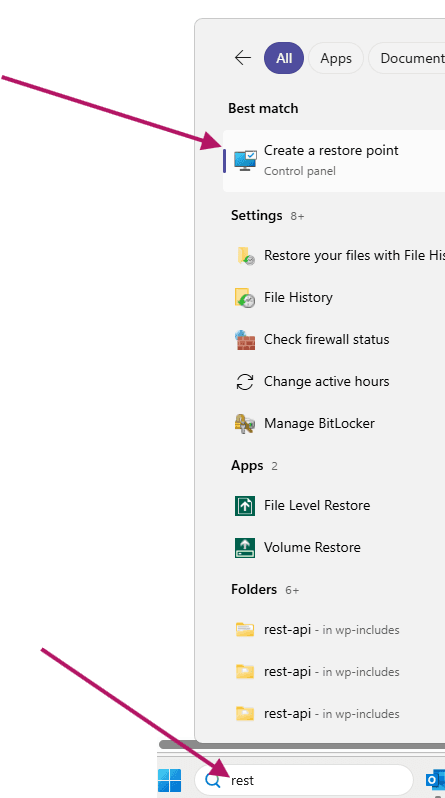
Step 2: Search for “Create a restore point”
Start typing Create a restore point and click the result when it appears.
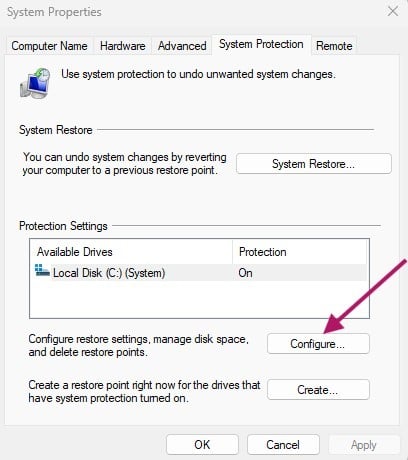
Step 3: Check Protection Is Turned On
Under Protection Settings, make sure your main drive (usually C:) shows Protection: On.
If it’s off:
- Select the drive
- Click Configure
- Choose Turn on system protection
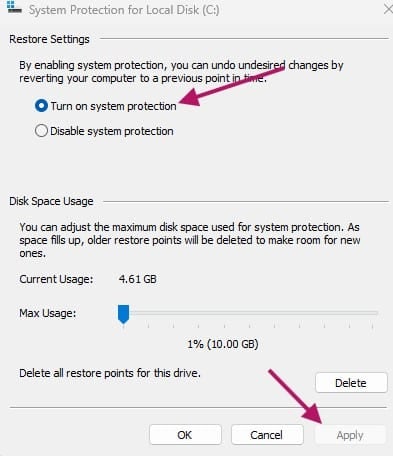
- You can also adjust Disk Space Usage on this screen, generally you want to use a maximum of 10% of your disk space for the restore files, if you have a small hard drive this is something to be mindful of as you may not have enough space to setup Restore Points and still have usable space for your day-to-day files and programs.
- Click OK or Apply and exit the window
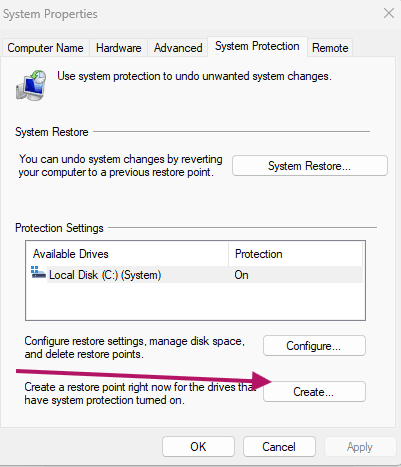
Step 4: Create a Current Restore Point
Click the Create button near the bottom of the window.
Step 5: Name Your Restore Point
Enter a short, clear name — for example:
“Before March Windows Update” or “Before new software install”
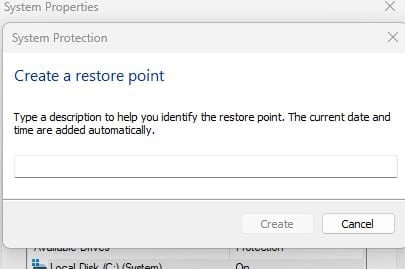
Click Create.
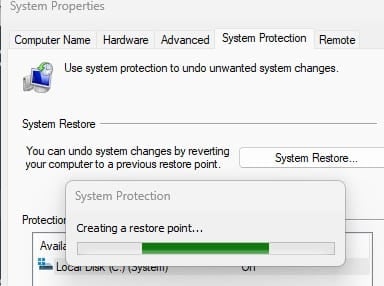
Step 6: Wait for Confirmation
Windows will take a moment to create the restore point.
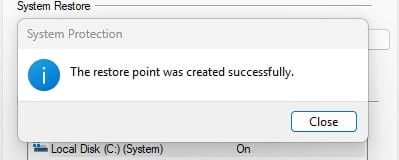
Once complete, you’ll see a confirmation message.
That’s it - your restore point is ready.
When Should You Create a Restore Point?
It’s a good idea to create one before:
- Installing new software
- Running major Windows updates
- Making system or registry changes
- Troubleshooting persistent issues
Think of it as creating a “just in case” option.
A Quick Note on Restoring
If something goes wrong later, you can return to this same menu and choose System Restore to roll your computer back to a previous restore point.
Windows will guide you through the process step by step.
Final Tip
Restore points are quick and easy to create but they’re often forgotten until they’re needed. Making them part of your regular routine can save you hours of troubleshooting later.
If you’d like help setting this up properly or want advice on backups and system protection, we’re always happy to help.